
Unless you live under a rock or in a cave without access to the internet, you have likely heard about NFTs – they have been all over the news and social media during the past year. An NFT (non-fungible token) is a unit of data stored on the blockchain that certifies a digital asset as being unique and therefore not interchangeable. NFTs are gaining popularity as a form of digital collectible.
Transforming a regular digital asset into an NFT is referred to as minting, which tokenizes that asset on the blockchain. All NFTs are sold using cryptocurrency, so both the buyer and seller need a cryptocurrency wallet to complete the transaction.
Verified using the blockchain, NFTs have transparent history of ownership, purchases, and trades that cannot be edited and are visible by anyone. Having an NFT on the blockchain ensures that it can always be traced from the current owner all the way back to the original creator.
A wide variety of digital files can be minted as NFTs, including:
- photos, illustrations and animated GIFs
- collectibles
- trading cards
- video footage
- music and other audio files
- virtual items in video games, including skins, virtual currency, weapons and avatars
- real world assets that have been tokenized, including real estate, cars, racehorses and digital sneakers, etc.
As an owner of an NFT, you are in possession of a digital good. The blockchain is seen as a global source of truth as to who owns what, in a digital sense.
Check out my 1/1 photo NFTs on Foundation & collections on OpenSea below.
Unique variety of 1/1 Photo NFTs

A unique variety of bold 1/1 photo NFTs not adhering to a single theme.
Doors of Old Town in Warsaw, Poland
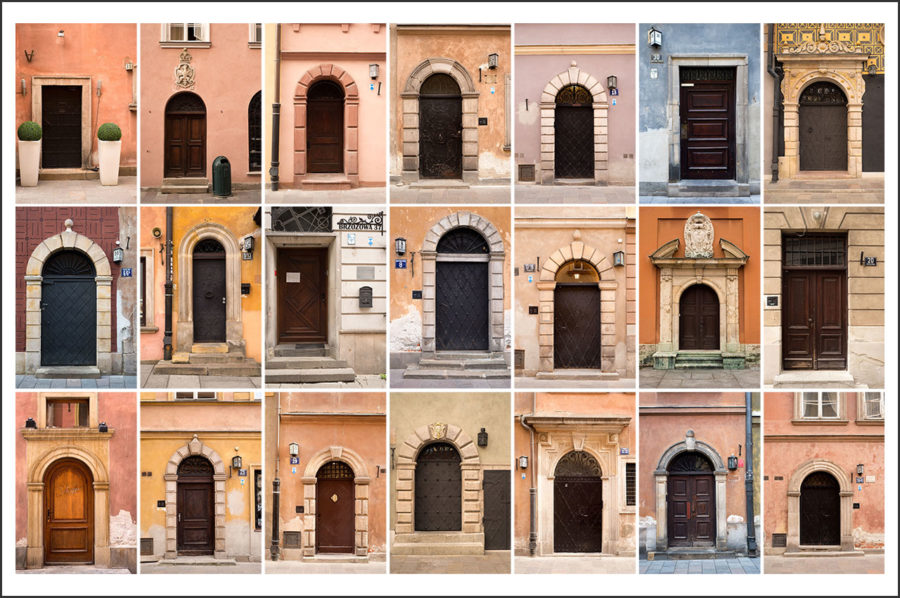
A collection of 30 1/1 photo NFTs featuring a variety of doors throughout Old Town in Warsaw, Poland.
Slava Ukraini! Heroiam slava!
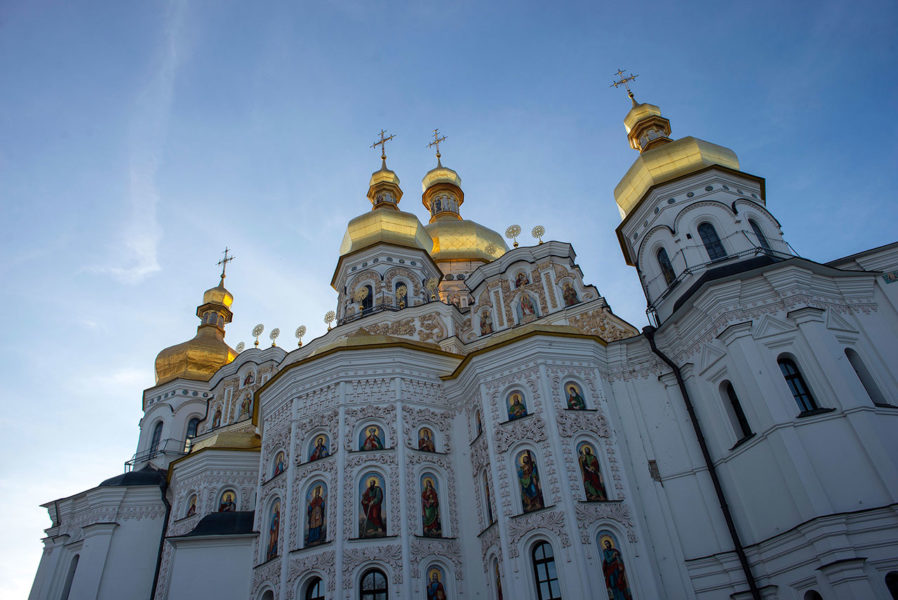
A collection of 50 photo NFTs of Kyiv. 100% of primary sale proceeds will be donated to help support Ukraine and Ukrainian refugees.
In this post, you will learn how to sell your photos as NFTs, step-by-step. Let’s get started.
Table Of Contents
- How to create an NFT
- Get a cryptocurrency wallet
- Fund your wallet with Ethereum
- Choose your NFT marketplace
- Connect your crypto wallet
- Create an NFT on OpenSea
- Create an NFT on Rarible
- Understanding Ethereum gas fees?
- NFT considerations
- Tips to protect your crypto assets
- NFT Frequently Asked Questions
How to create an NFT
Creating an NFT is a relatively simple process, and does not require deep knowledge of crypto. Before creating your NFT, you’ll need to decide which blockchain you want to mint it on.
Ethereum is by far the leading blockchain service for NFTs, so it makes sense to use that if you’re looking for the widest reach possible.
Here are some other blockchains that are growing in popularity:
- Binance Smart Chain
- Tron
- Polkadot
- Tezos
- Cosmos
- Flow by Dapper Labs
- EOS
There are separate NFT token standards, compatible wallet services and marketplaces for each blockchain. This means that if you create an NFT on the Binance Smart Chain, you can only sell it on platforms that support Binance Smart Chain assets.
Since Ethereum is by far the largest NFT ecosystem, you will need a few things to mint your NFT on the Ethereum blockchain:
- An Ethereum wallet that supports the Ethereum-based NFT token standard ERC-721. You could choose from MetaMask, TrustWallet or Coinbase Wallet.
- At least $50-100 in ether (ETH) to pay for any fees associated with listing your NFT. You may need more than this as fees can be quite costly.
Get a cryptocurrency wallet
In order to sell your photos as NFTs, you will need a cryptocurrency wallet. There are a number of wallets to choose from, but for the purposes of this tutorial, we are going to use MetaMask. We will go through the installation process to add the Google Chrome browser extension, but the process is similar for the Android and iOS mobile applications.
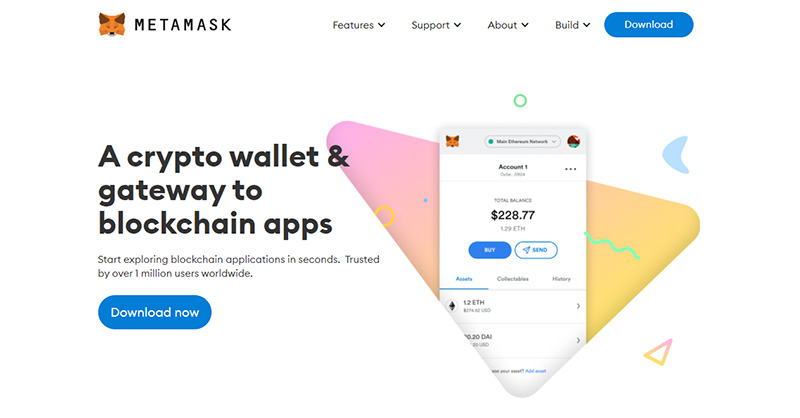
Head over to metamask.io, and click the Download now button. On the next screen, choose whether you want to install the Chrome browser extension or the mobile app for iOs or Android.
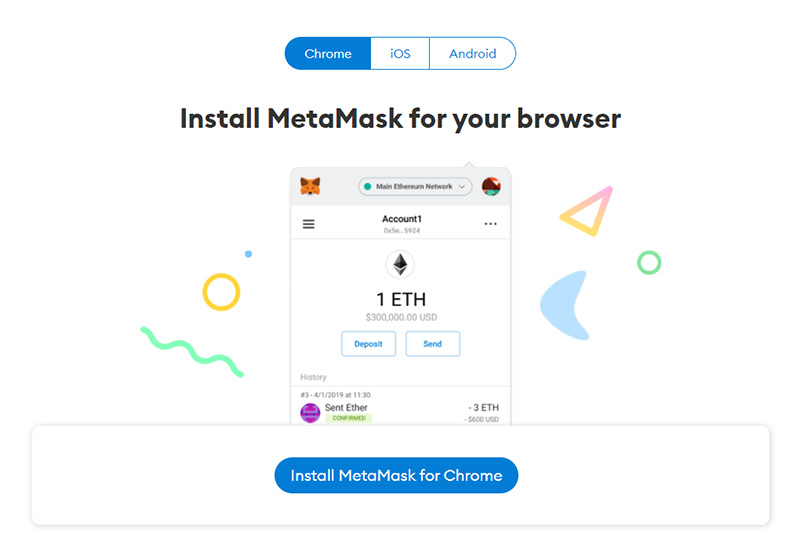
Click the Install MetaMask for Chrome button to download the extension.
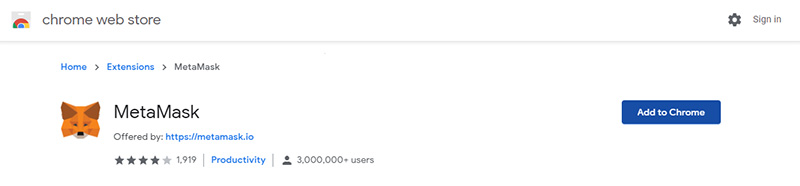
On the next screen, press the Add to Chrome button.
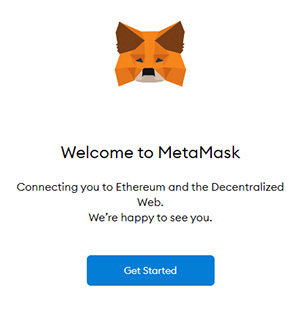
Then, click the Get Started button.
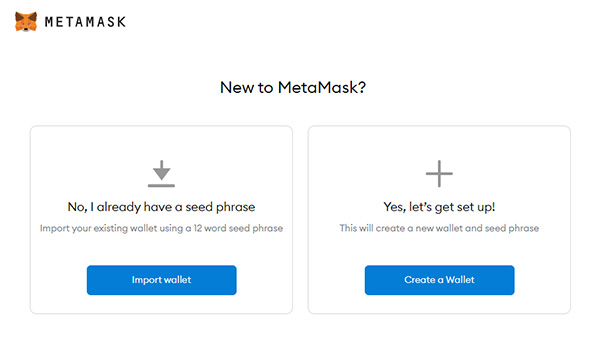
On the next screen, you can either import an existing wallet or create a new one. If you already have a wallet, you will need to enter your 12 word seed phrase to import it. Otherwise you can set up a new wallet.
For either option, follow the instructions and make sure to keep your seed phrase in a safe location.
VERY IMPORTANT: If you lose your seed phrase, you could permanently lose your crypto and any NFTs that you’ve acquired!
Fund your wallet with Ethereum
In order to interact with decentralized applications using MetaMask, you will need some Ether in your wallet. While NFTs can be sold using other cryptocurrencies, Ethereum is used for the vast majority of transactions.
There are a few ways you can fund your crypto wallet, including:
- Buying directly with Wyre or direct deposit
- Transferring from another online wallet
- Connecting and transferring from an offline hardware wallet
Once you’ve funded your crypto wallet, you’re ready to proceed to the next step.
Choose your NFT marketplace
Now that you’ve created a wallet and funded it with some Ethereum, you are ready to select an NFT marketplace. While OpenSea is by far the most widely-used, there are quite a few others, including:
- Rarible
- Mintable
- SuperRare
- Foundation
- Nifty Gateway
In this post, we’re going to show you how to add an NFT on both OpenSea and Rarible. Creating and minting NFTs on the other platforms listed is similar to the process covered below.
Connect your crypto wallet
In order to create your account, you’ll need to first connect your wallet. Click on the circle button in the upper right-hand corner on OpenSea.io.
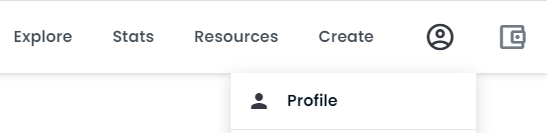
On the next screen, click on the wallet that you created earlier and then connect to the site.
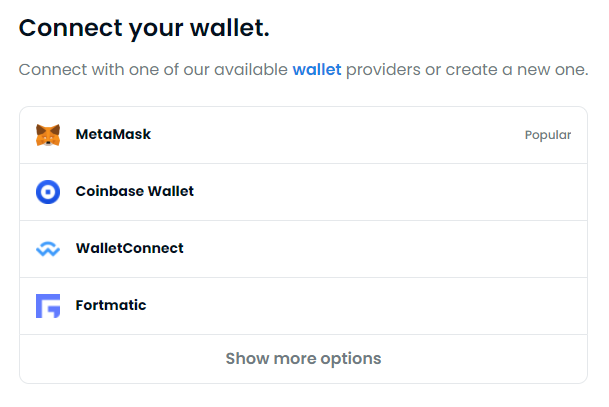
*Connecting your wallet to Rarible is similar – simply click the Sign in button in the upper right-hand corner and select the wallet you use. Then connect to the site.
Create an NFT on OpenSea
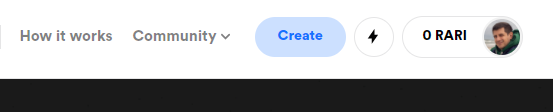
As soon as you’ve connected your crypto wallet to OpenSea, you’re ready to create your first NFT. Simply click the Create button in the top right.

You will then need to approve this action in your wallet.
1/1 or semi-fungible NFT (open edition)
Before you create your NFT, think about whether you want it to be a 1/1 (a truly unique 1-of-a-kind NFT) or a multiple (think of an open edition with multiple copies of a specific NFT).
If you want to create a multiple semi-fungible NFT* (only applicable for ERC1155 NFTs on Ethereum), you will need to add ?enable_supply=true to the end of the URL (https://opensea.io/asset/create?enable_supply=true) and press enter.
This will allow you change to Supply field to a number other than 1. Just make sure to make listings with Quantity set to 1 so that buyers can choose to buy a single copy.
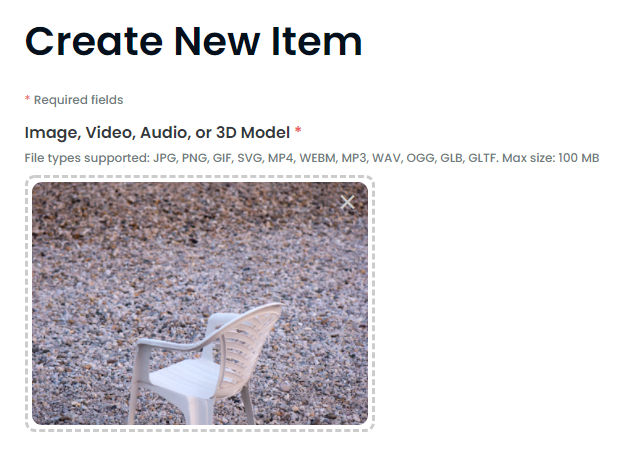
On the next screen, you can upload an image, video, audio or 3D model file. You can upload the following file types: JPG, PNG, GIF, SVG, MP4, WEBM, MP3, WAV, OGG, GLB, GLTF. The maximum upload size is 100 MB.
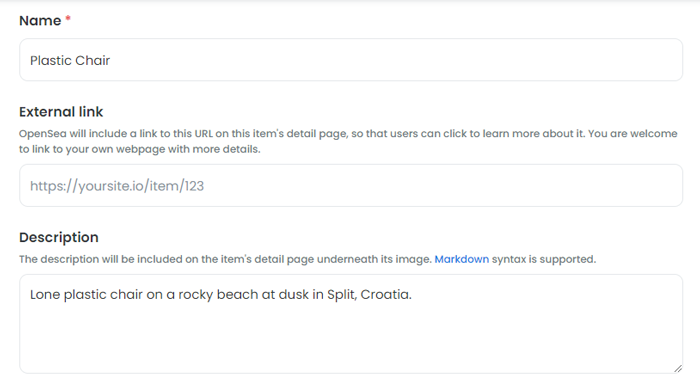
Name – Give your NFT a unique name.
External link – If you’d like to include a link to an external resource on the NFT’s detail page, you can include it here. You could use this to link to a page on your website that has more information about the NFT.
Description – Add a detailed description of your NFT here. You can include any relevant information about the NFT or unlocked items available upon purchase.
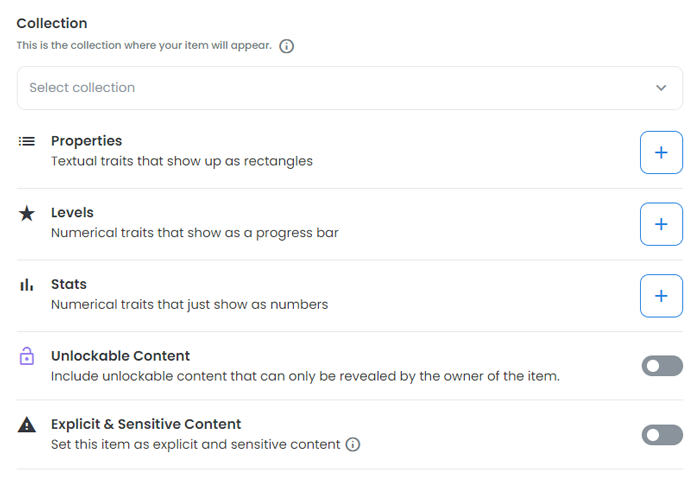
Collection – Here, you can choose a collection for this NFT. If it’s a 1/1, you don’t necessarily need to put it in a collection, although doing so lets you better organize your NFTs, in my opinion.
Properties – These are textual traits that show up as rectangles.
Levels – You can add numerical traits that are shown as a progress bar.
Stats – These are numerical traits that show up as numbers.
Unlockable Content – If you’d like, you can add unlockable content that can only be viewed by the owner of the item. This could include a wide variety of perks available to the buyer of your NFT.
Explicit & Sensitive Content – If your NFT contains explicit or NSFW content, you should make sure to enable this.

Supply – Here, you’ll want to choose whether the NFT will be a 1/1 or an open edition. By default this field cannot be adjusted, but if you followed the instructions I mentioned at the beginning of this section, you can adjust it to any number you like.
Blockchain – Select whether you want your NFT on the Ethereum blockchain (golden standard and most popular) or if you want to put it on Polygon, a fast, gas-free blockchain that works in conjunction with Ethereum.
Freeze metadata – Once you’ve created your NFT, you can choose to permanently lock and store all of its content in decentralized file storage. NOTE: This will cost you extra gas, and you probably won’t want to do it.
Once you’ve uploaded your file and filled out all the details, go ahead and click the blue Create button.
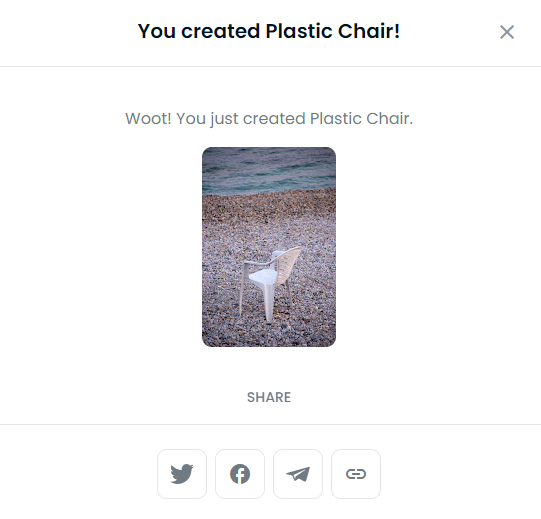
Then, you’ll see that your NFT has been created successfully. While you’ve successfully created your first NFT, it’s not available for purchase on the blockchain yet. Keep reading to learn how to list your NFT for sale.
List NFT for sale on OpenSea
Once you’ve paid your initial gas fees and finished initializing your account, you can list your NFT for sale.
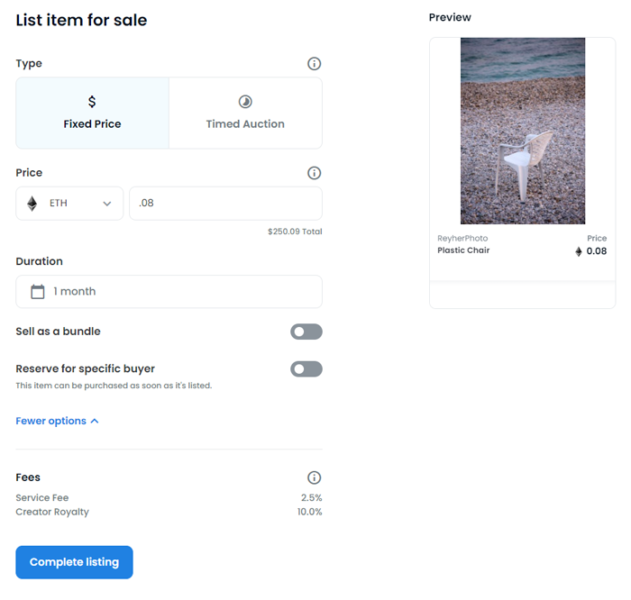
Type – Choose whether you want to sell your NFT at a fixed price or in a timed auction.
Price – Set a price for your NFT. You can use ETH, DAI or USDC. Generally, you want to use ETH as that is the standard that most use.
Duration – Choose how long you want your NFT to be on sale for – 1 day, 3 days, 1 week or 1 month.
More Options – If you click this link, you can choose to sell your NFT as part of a bundle or reserve it for a specific buyer.
Once you’ve entered all the information, simply click the blue Complete listing button at the bottom.
PLEASE NOTE: If this is your first listing on OpenSea, you will need to pay 2 gas fees associated with initializing your account. It’s wise to check current Ethereum gas prices, and you may want to wait until gas is lower (sometimes it’s very expensive to do any transactions on the Ethereum blockchain because gas can be crazy!).
Congratulations! You’ve created and minted your first NFT on the blockchain.
I generally prefer using OpenSea as opposed to Rarible because they have what is called “lazy minting.” This means that sellers do not have to pay up-front gas fees to mint each individual item. Instead, each NFT is minted once it’s been sold.
Create an NFT on Rarible
Once you’ve created and connected your wallet, click on the Create button on the top right of the screen.
Then, you will need to choose whether the item you want to create will be a 1/1 or open edition.

Single or Multiple NFT collectible
With Single and Multiple NFT collectibles you can choose how you want to list your item. With Single, you can choose from fixed price, timed auction or unlimited auction. Multiple only lets you choose from fixed price or unlimited auction.
Single – Here, you have three choices as far as selling your NFT
- Fixed price – Enter a price at which buyers can instantly purchase your NFT.
- Timed auction – Specify a period of time in which buyers can place bids. You can choose to start the auction right away or select a date and time. The expiration date of the auction can be 1, 3, 5 or 7 days. Alternatively, you can manually enter a date and time for it to end. With this option selected, you can enter a minimum bid. Any bids below this amount won’t be accepted.
- Unlimited auction – Allow users to make bids for an unspecified amount of time. With an unlimited auction, there is no minimum bid. You simply let users bid, and choose to accept or reject them.
Multiple – Here you can only choose from Fixed price or Unlimited auction.
Once you’ve decided how you want to sell your NFT, you’re ready to upload an image of it, and add any relevant details.
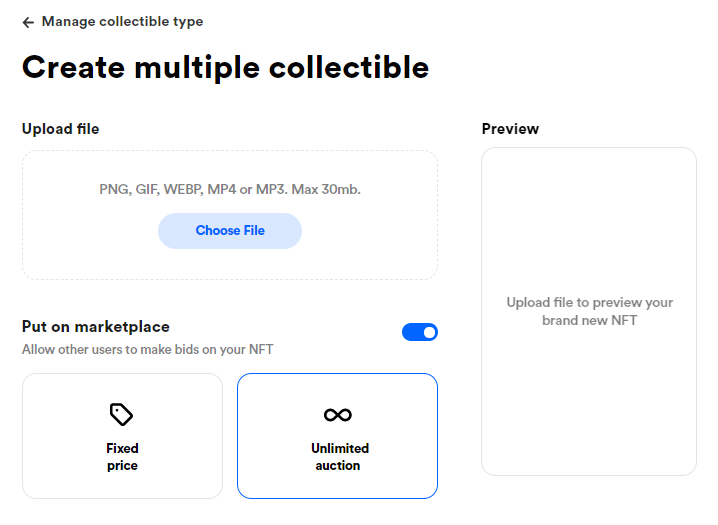
Upload file – Upload a PNG, GIF, WEBP, MP4 or MP3 (maximum file size is 30MB).
Price – If you selected fixed price as your listing type, enter the price for a single piece in Ether. You can see the amount you will receive in dollars below (after the service fee is taken).
Minimum bid – If you’re selling a single NFT collectible and you selected timed auction, enter a minimum bid amount. Then, specify a starting and expiration date for your auction.
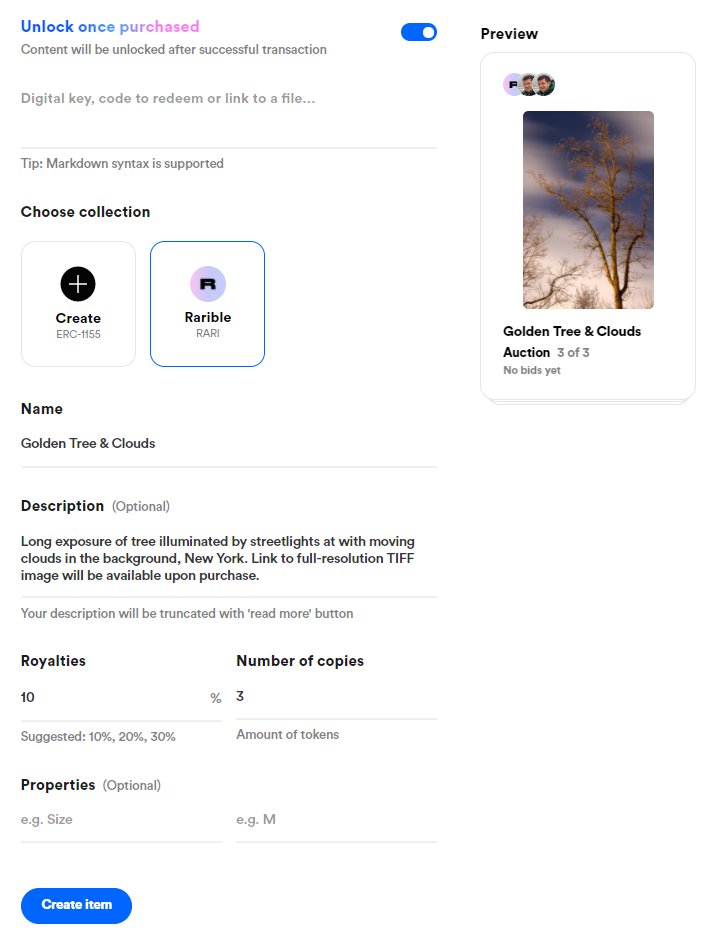
Unlock once purchased – If you’d like to include special content for the buyer after they’ve bought your NFT, you can do so. For a photo NFT, this could include a link to the high-resolution image or a free signed photo print shipped to them (you can specify that a free print only applies to the first buyer).
Choose collection – Select whether you’d like to use your own token. By default, Rarible is selected and that is what most people seem to use.
Name – Give your NFT a name.
Description – Enter a detailed description of your NFT, including any information about special items unlocked upon purchase.
Royalties – Enter a percentage for royalties paid to you (applicable for all subsequent sales of your NFT).
Number of copies – Enter the number of tokens you want to create for your NFT.
Properties – You can add some properties for your artwork, including size, medium, etc.
Once you’ve configured all options and fill out NFT details, click the Create item button.
Mint your NFT on Rarible
Now that you’ve filled out all the details and created your NFT, you will need to mint it and pay the ETH gas fee to put it on the blockchain. This fee can be pricey, so you will want to see what it currently is, and may want to wait if it’s very high. Generally, weekends seem to be less expensive when it comes to Ethereum gas prices.
OMG: I did a test minting of a new item today, and the gas fee was over $200! I didn’t go through with it and will mint the item when the price is significantly lower.
Keep in mind that it costs the same to mint a single token as it does multiples, so you will want to take that into consideration.
I think it’s best to list an item or two and try to sell them. Then, you can mint and list more items later after you get a feel for what sells, etc.
After you click the Create item button, you’ll see the following popup.
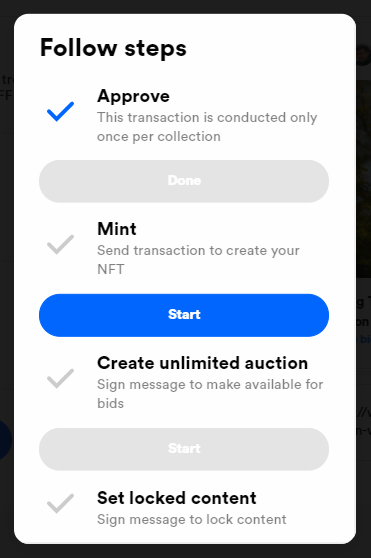
Click on the blue buttons from the top down. If this is your first transaction, you’ll have to get it approved. Then, click the button under Mint to officially create your NFT and add it to the blockchain. Then, you will have to approve the transaction in your wallet. Now your NFT is officially listed.
IMPORTANT: Gas fees are not cheap, but I read somewhere that they tend to be less expensive on the weekend. I did a test to see if there was a difference in gas when I minted a single vs. a multiple NFT, and they’re the same.
Understanding Ethereum gas fees?
In order to make any transaction on the Ethereum blockchain, you will need to pay a gas fee. These fees vary based on the complexity of a given transaction. While the amount of gas required for any given transaction remains constant, the price of that gas varies greatly.
- If the price of Ethereum increases, the average gas price goes down. On the other hand, when the value of Ethereum decreases, the average gas price goes up.
- When the demand for settlement on the Ethereum blockchain goes up, the gas price does as well. Conversely, the less demand there is, the lower the gas prices.
You will need to pay Ethereum gas fees whenever you do the following:
- Mint a truly unique (1 of 1) or multiple NFT
- Bid on an item
- Cancel a bid
- and any other transactions on the blockchain
These gas fees can be VERY expensive, so it’s wise to check the fees BEFORE you go ahead and mint your NFT.
You can easily check the ETH gas prices using the Ethereum Gas Tracker.
NFT considerations
When selling your photos as NFTs, there are a number of things to take into consideration. Since you’re just getting started, you will need to think about specific details of your listings.
Pricing your NFTs
This is a tricky subject, and there is no one-size-fits-all answer. How you price your NFTs depends on a number of factors, including:
- Are you well-known in the art world?
- What kind of following do you have?
- Have you sold physical pieces before?
- Is the piece you’re selling a limited or open edition?
My suggestion is to put a couple pieces up and experiment with different price points. Make sure that your minimum price more than covers your gas fee, as well as fees charged by the NFT marketplace you’re using. There have been cases of people actually losing money on NFTs they sold because they didn’t account for fees.
Don’t view selling NFTs as a get rich quick scheme, because they don’t exist. While there are numerous artists making a killing selling NFTs, this should be regarded as the exception, not the rule.
NFT edition size
When creating your first NFT, you may wonder whether to create a one-of-a-kind piece or an open edition consisting of multiple tokens. Again, I would experiment and maybe try 1 or a couple of each.
With my first NFTs, I made open editions each consisting of 3 pieces. I don’t have any bids yet, but we’ll see what happens.
Type of NFT sale
As mentioned earlier, on Rarible you can create an NFT either as a single limited edition or an open edition with multiple pieces. Choose whether you want to hold a timed (only with single NFT) or unlimited auction, or to sell pieces at a set price.
Again, I think it makes sense to just experiment. There is no right or wrong way to list an NFT, and you’ll hopefully gain some insight and see what works best for you and your digital creations.
Tips to protect your crypto assets
There are a lot of hackers and scammers in the crypto space, so it’s important to protect yourself. Here are some tips to help keep your digital assets safe.
Keep your seed phrase safe
The first, most important step is to never share your seed phrase with anyone and make sure you store it completely offline. You should write it down or print it out on a piece of paper and keep it in a safe or safety deposit box at your bank. Hackers can gain access to your devices in a number of ways, so make sure you don’t have your seed phrase on any of them.
Support will NEVER ASK FOR YOUR SEEDPHRASE, so stay vigilant and don’t give it to anyone.
Use a cold wallet
When dealing with crypto, it is absolutely crucial to get yourself a cold wallet (also referred to as a hardware or offline wallet). You may be asking yourself why you’d want to use a hardware wallet, right?
You need to use an offline wallet because it is not connected to the internet, and is much less vulnerable to hacks. The only way someone could steal your stuff on a cold wallet is if you connect to a malicious website, or if someone gets your seed phrase or kidnaps you and forces you to transfer all your crypto assets. If you’re using only a web-based hot wallet, you’re much more susceptible to hacking, phishing and all kinds of other malicious crap.
Offline wallets should be used to hold the majority of your cryptocurrency and NFTs. Make sure to secure your cold wallet with a long PIN. I personally use a Ledger Nano S, and use an 8-digit PIN number.
While you can have a hot wallet for smaller transactions while on-the-go, make sure you keep the majority of your crypto assets in a cold wallet.
* ONLY buy a cold wallet from official websites, and steer clear of any offers Amazon, eBay, etc. Scammers also sell cold wallets riddled with malware that lets them access and steal your crypto.
Don’t use a wallet on your smartphone
I recommend not using Metamask, Trust Wallet or any other web-based hot wallet on your mobile phone. Instead, if you’re going to use a hot wallet for smaller transactions, do it on your computer. Like I said, hackers are relentless, and I’ve heard many stories of people getting hacked via SIM swap attacks.
Watch out for scammers
The crypto scene is full of scammers trying to steal your assets. There are a number of tricks they use to try and gain access to your digital wallets, including:
- Phishing attacks where they send malicious links via twitter DMs or in Discord. When clicked on they can take control of your wallet and empty it out. As a rule, never click on links from people you don’t know.
- Airdropping mysterious shitcoins to your wallet. If you see a shitcoin in your wallet that you didn’t purchase, just ignore it. If you try to approve it for trading (on Uniswap for example), it can completely drain your wallet and steal everything from you.
- Posing as technical support for a crypto wallet. Tech support will NEVER ask you for your seed phrase. Watch out for fake tech support on Twitter.
Use unique, strong passwords
This is a well-known tip regarding online safety in general. Don’t use the same passwords on multiple accounts, and make sure to use strong passwords (e.g. not your name, birth year, etc.). Limit your risk by having a unique, strong password for every site or app, and enable two-factor authentication whenever possible. You can use a trusted password manager to help keep all your passwords safe.
Only use reputable crypto wallets and exchanges
Before choosing which platforms to use, you should carefully research the security features of them to understand how they protect your assets. Feel free to use more than one platform, but make sure you’re using unique, strong passwords for each.
NFT Frequently Asked Questions
With NFTs being such a new phenomenon, there are a ton of questions surrounding them. Below, you will see common questions and answers.
Conclusion
Hopefully this tutorial taught you all you need to know in order to transform your photos into NFTs and try to sell them. This new digital collectible space is full of unknowns, so feel free to experiment with different price points, edition sizes and types of imagery too. Mint a few pieces on the blockchain and see what happens.
Best of luck to you in your NFT journey!
If you have any questions or something to add, please leave a comment below or connect with me on twitter.
hey! Thanks for this great write up. I’m still trying to wrap my head around this NFT stuff . When I clicked the link for gasnow.org, the link says it’s Gas Now but it opens Bitcoin.org. This happened on another site that linked to gasnow.org as well. Didn’t know if you knew that. I’m having trouble understanding what a typical “gas” cost would be and was hoping that link would help. Anyway, just wanted to ask about it.
Hey there. Thanks for your comment. Gasnow.org has been discontinued, and whoever owns the domain must have forwarded it to bitcoin.org. I have updated the post to include a new resource, which is the Ethereum Gas Tracker (etherscan.io/gastracker). Thanks for catching that and be well!
Hi.
In wallet section you are mentioning metamask as option, and then on the bottom next to hot and cold wallets you are mentioning to stay away of metamask?
Thank you for your further clarification.
Hi there. I recommend to use Metamask, but it’s safest to use it in conjunction with a hardware or cold wallet. I also wrote that “I recommend not using Metamask, Trust Wallet or any other web-based hot wallet on your mobile phone.” Smartphones are generally more susceptible to viruses or malware than your computer. Of course, it’s important to be careful no matter what device you’re using. That being said, using a computer is better than a smartphone-based crypto wallet. Hope that helps!
The install MetaMask to chrome doesn’t work on my iPhone it only shows a page that I should add to Desktop and I click on it nothing shows up again it just showed successfully added
While I wrote that it’s MUCH better to use MetaMask on a computer and NOT a smartphone, if you want to use it on your iPhone, download the offical MetaMask mobile app in the App Store.
thanks for the lovely write up sir
I suggest you can create a group where you can enlighten us more cause I’m a cartoonist and editor and I have got so much interest in this NFT but it very broad for me when I try doing this on my own that’s why I want you to help me out sir if u can get connected to you maybe via whatsapp or something…. I’m totally a novice to NFT and I want to delicate myself on it to learn more and I know I’m gonna bring good thing out of it thanks.
Remain bless
Hi Ogunsiji, I’m glad you found my post useful. While I have no plans to set up a group at the moment, you can always reach out to me on twitter @reyherphoto. Stay blessed!
Blockchain – Select whether you want your NFT on the Ethereum blockchain (golden standard and most popular) or if you want to put it on Polygon, a fast, gas-free blockchain that works in conjunction with Ethereum.
Please is there any advantage in using ethereum instead of Polygon
Or is there any disadvantage in using polygon instead of ethereum.
I am wondering whether ethereum will offer any advantage over polygon since there is a fee involved.
Hi Anthony, I would highly recommend using the Ethereum blockchain because it is the most popular, and regarded as the most serious one. Yes, there are fees you’ll have to pay, but it’s worth it to be on the best blockchain.
Thanks a lot for your lovely knowledgeable information. I’m completely novice to NFTs but I’ve already made my Binance, Metamask & an OpenSea account linked to metamask. Although I’ve not done any transactions yet as I’m not so experienced but I’ve some wonderful Art ideas and photography collections to put on sale in future, of course on my laptop. What would you suggest dear. Stay Blessed.
Hi Khudadad, it’s really up to you what kind of NFTs you want to create. I recommend selecting your very best work. Hope that helps!
Thank you so much for this co-herent, non waffle, non gobbledygook info, Marshall. Questions, are we paid not our wallet in real money? How do we get our money with no card or check {cheque}? Have had a proposal, ‘agent’, to send my image ,after gas payment, and they will mint it, take 20% as they clients have money. The process of them minting does not seem right as I have no control over how they mint it. would be grateful for your comments / answers. Thank you again! Mary
Hi Mary,
What do you mean “are we paid not our wallet in real money?” Generally, one would fund a crypto wallet like Metamask by sending crypto from an exchange, such as Coinbase, Binance, KuCoin, etc. The “agent” sounds like a scammer. One must be super careful in the crypto space because there are a lot of shady characters. Hope that helps!
Marshall
Thank you for the reply, Marshall. ‘Our we paid, not through our wallet…’, was bad punctuation. Following your instructions, I set up and funded a cryptowallet from my bank account. Been busy since. Presumably, payments go into the crypto wallet. How do we change the crypto coins back into money? I am ready to proceed following your instructions, thanks again, but I do not recall contracts being mentioned and wonder how these are done – possibly,when minting? As an artist, what is the least apount that I should offer work for? I note from your Instagram page that you are a philanthropist, a welcome asset to the world today.
Hi Mary,
Your best bet to turn crypto back into fiat money (currency) is to use a crypto exchange such as Coinbase, Binance, KuCoin, etc. Sign up for an account at one of those places, then you’ll be able to transfer crypto from your Metamask to your crypto exchange account and convert it to fiat money, which you can then withdraw to your bank account. It’s not the most user-friendly, but that’s how it’s done. As far as pricing your work, that’s a tricky question. There is no “right” answer regarding that. What kind of artwork are you looking to sell, and are they 1 of 1s or editions (multiples) of a single piece of artwork? Thank you, I am trying to do my part, but seems I can’t sell too many of my NFTs. I am trying though!
Best,
Marshall